Vorhangmaxx Installation Guide
Installation of Pleated Curtains

Step 1: Insert Gliders into the Track
🔹 Check how many hooks are attached to the curtain.
🔹 Insert the same number of gliders into the curtain track.
🔹 Ensure that the gliders can move smoothly along the track.

Step 2: Check the Hook Height
🔹 The hooks are already attached to the pleats. Make sure all hooks are at the same height so the curtain hangs neatly and evenly.
🔹 If necessary, carefully adjust the hooks.

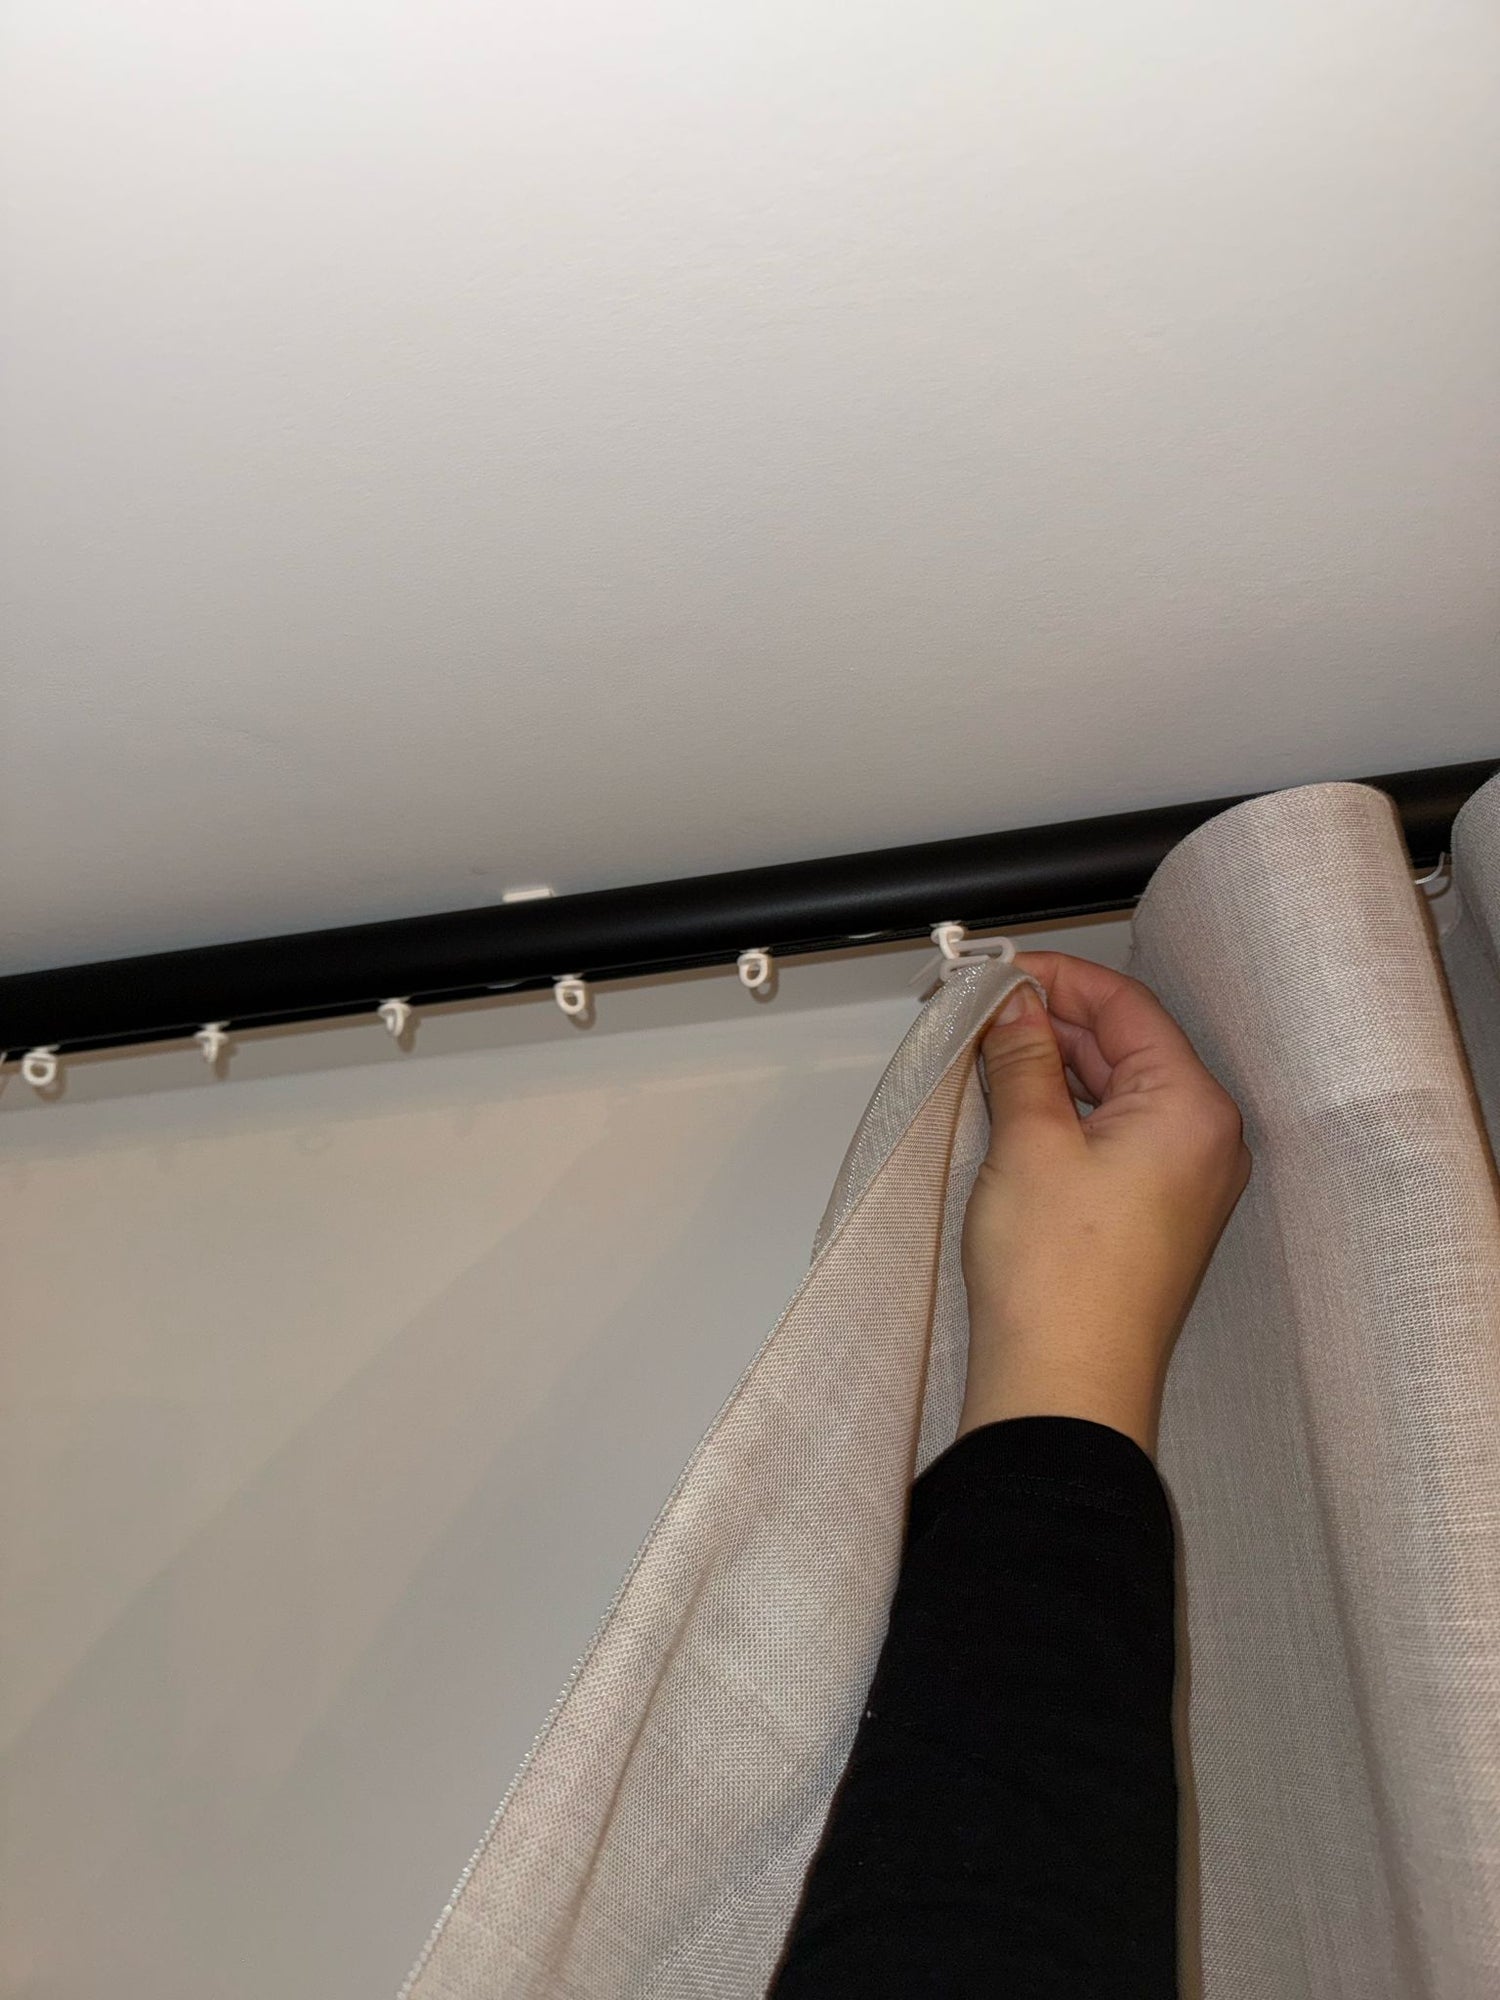
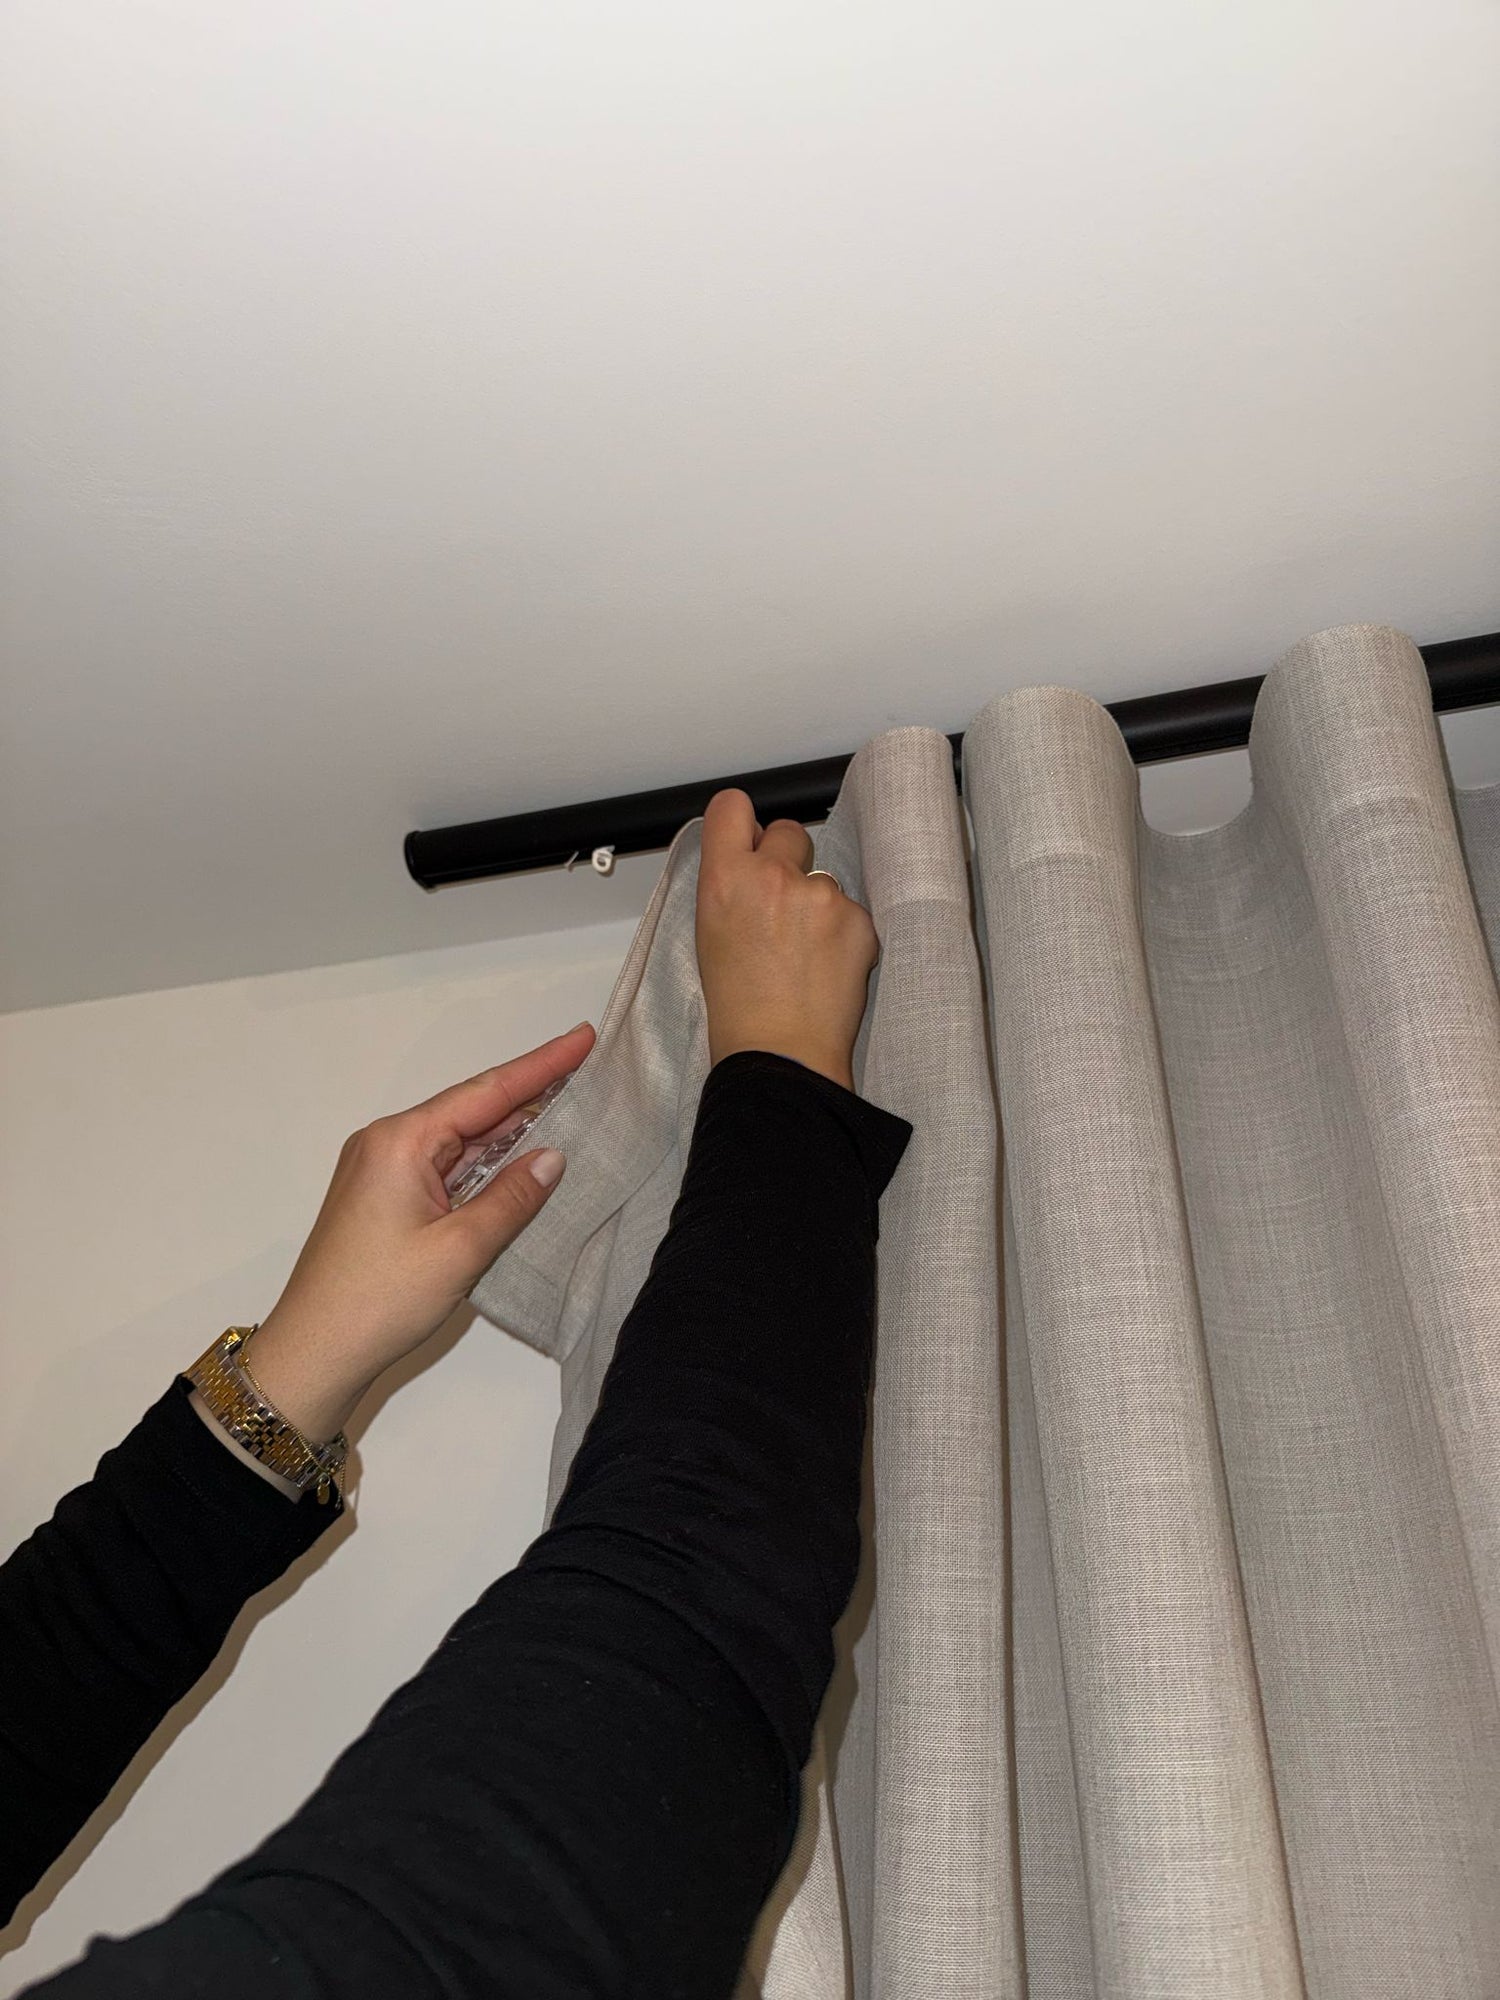
Step 3: Attach the Curtain to the Track
🔹 Start at one end of the curtain and attach the hooks one by one into the gliders in the track.
🔹 Ensure the curtain is evenly distributed and that the pleats form neatly.

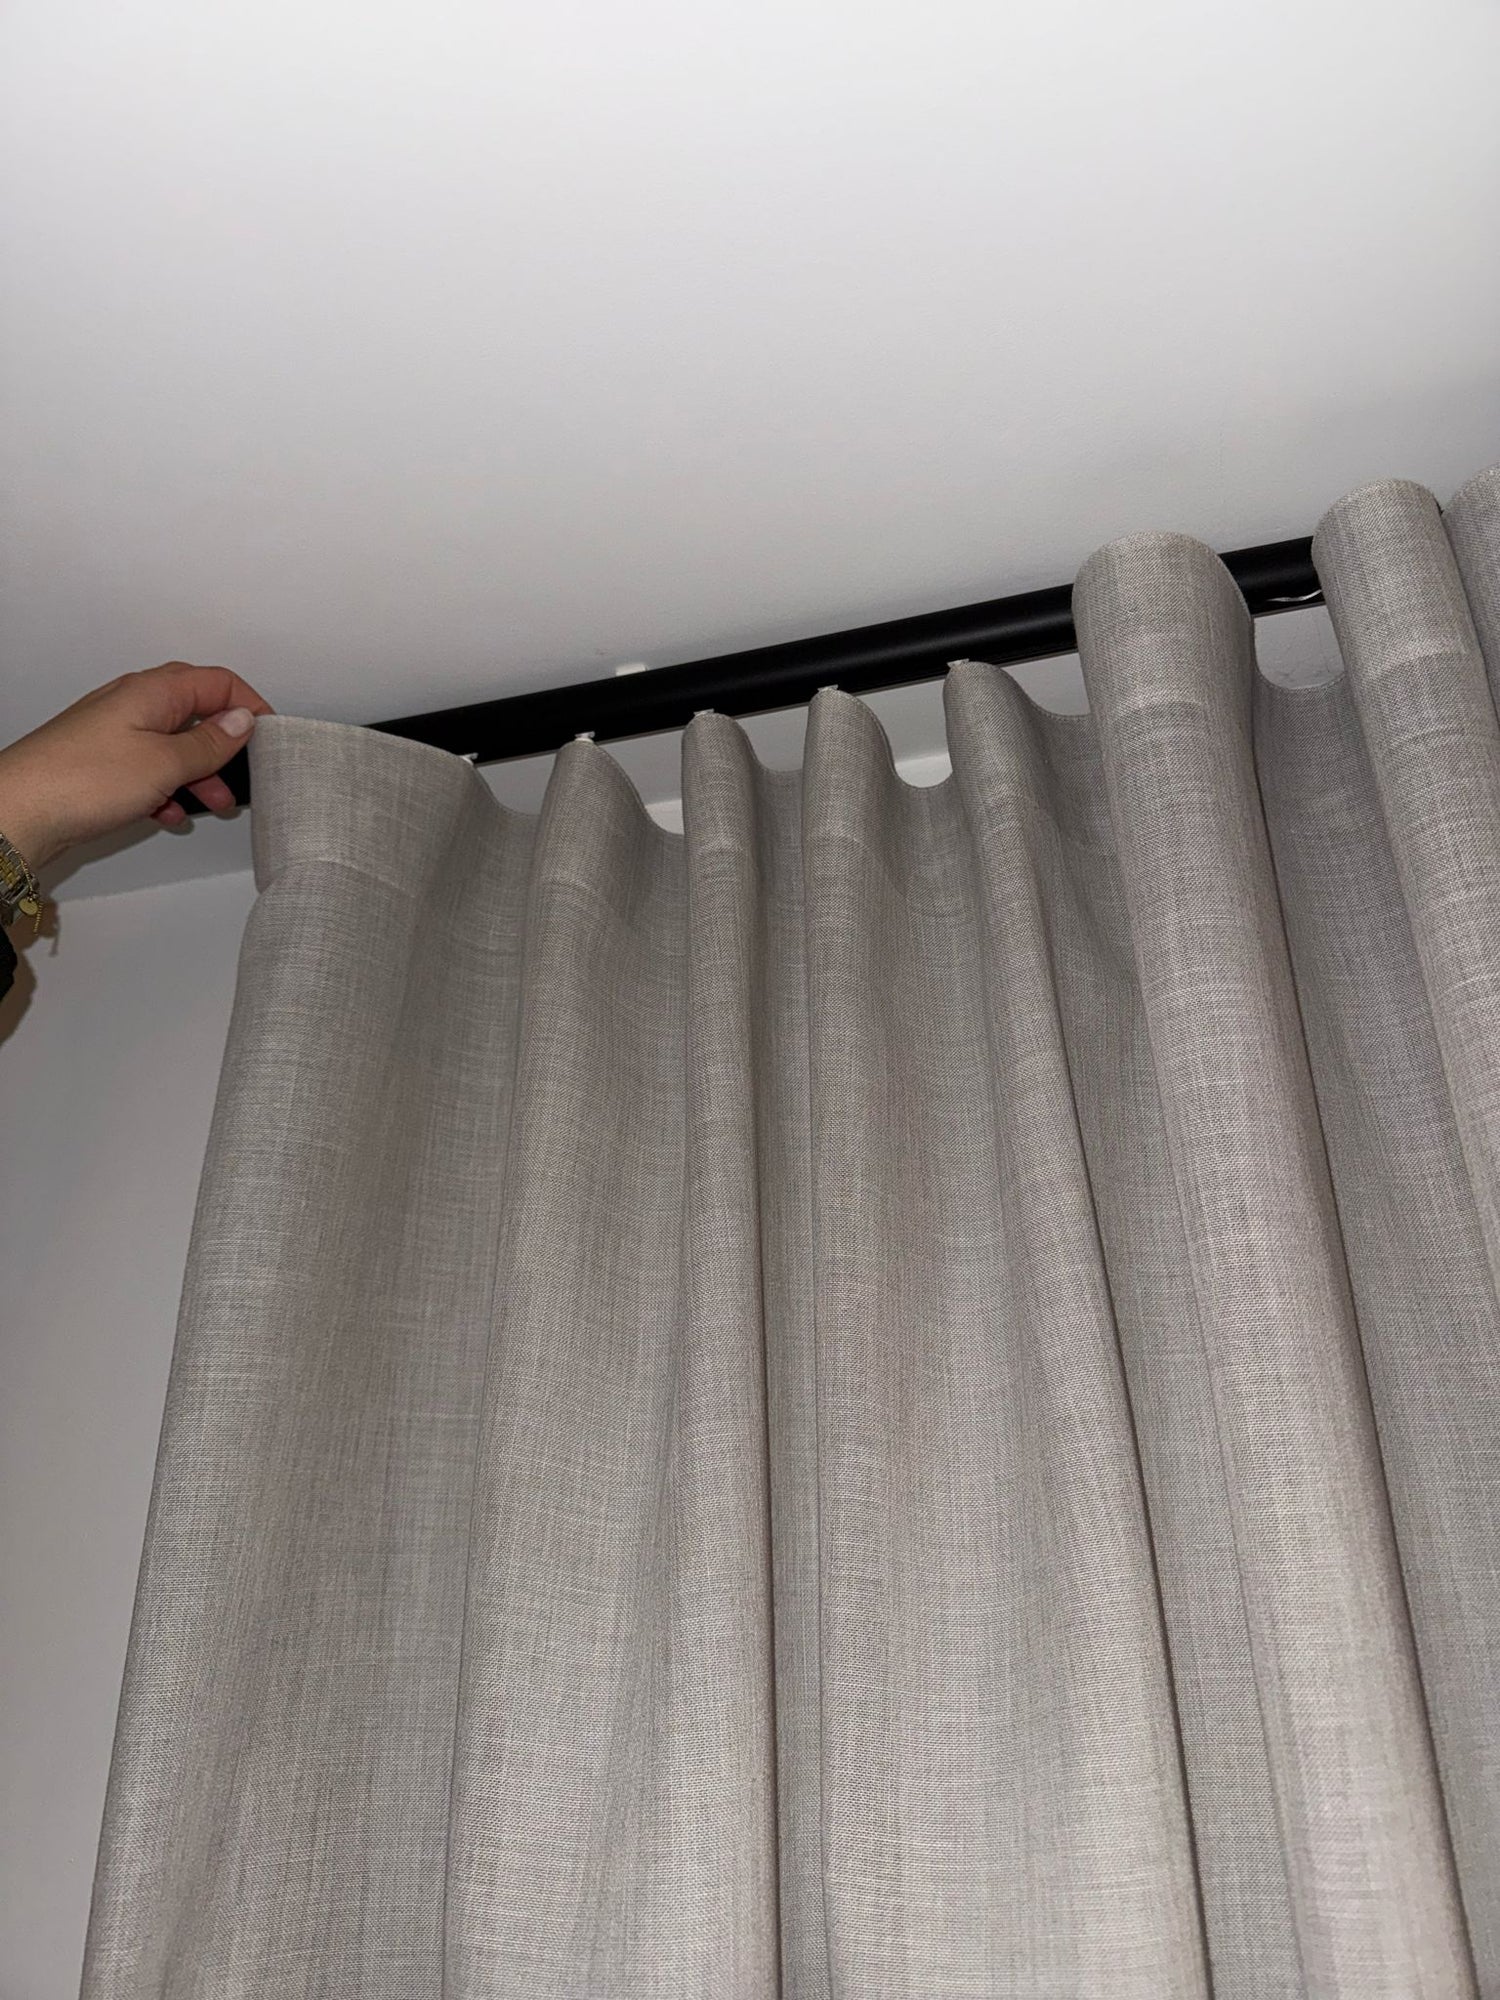
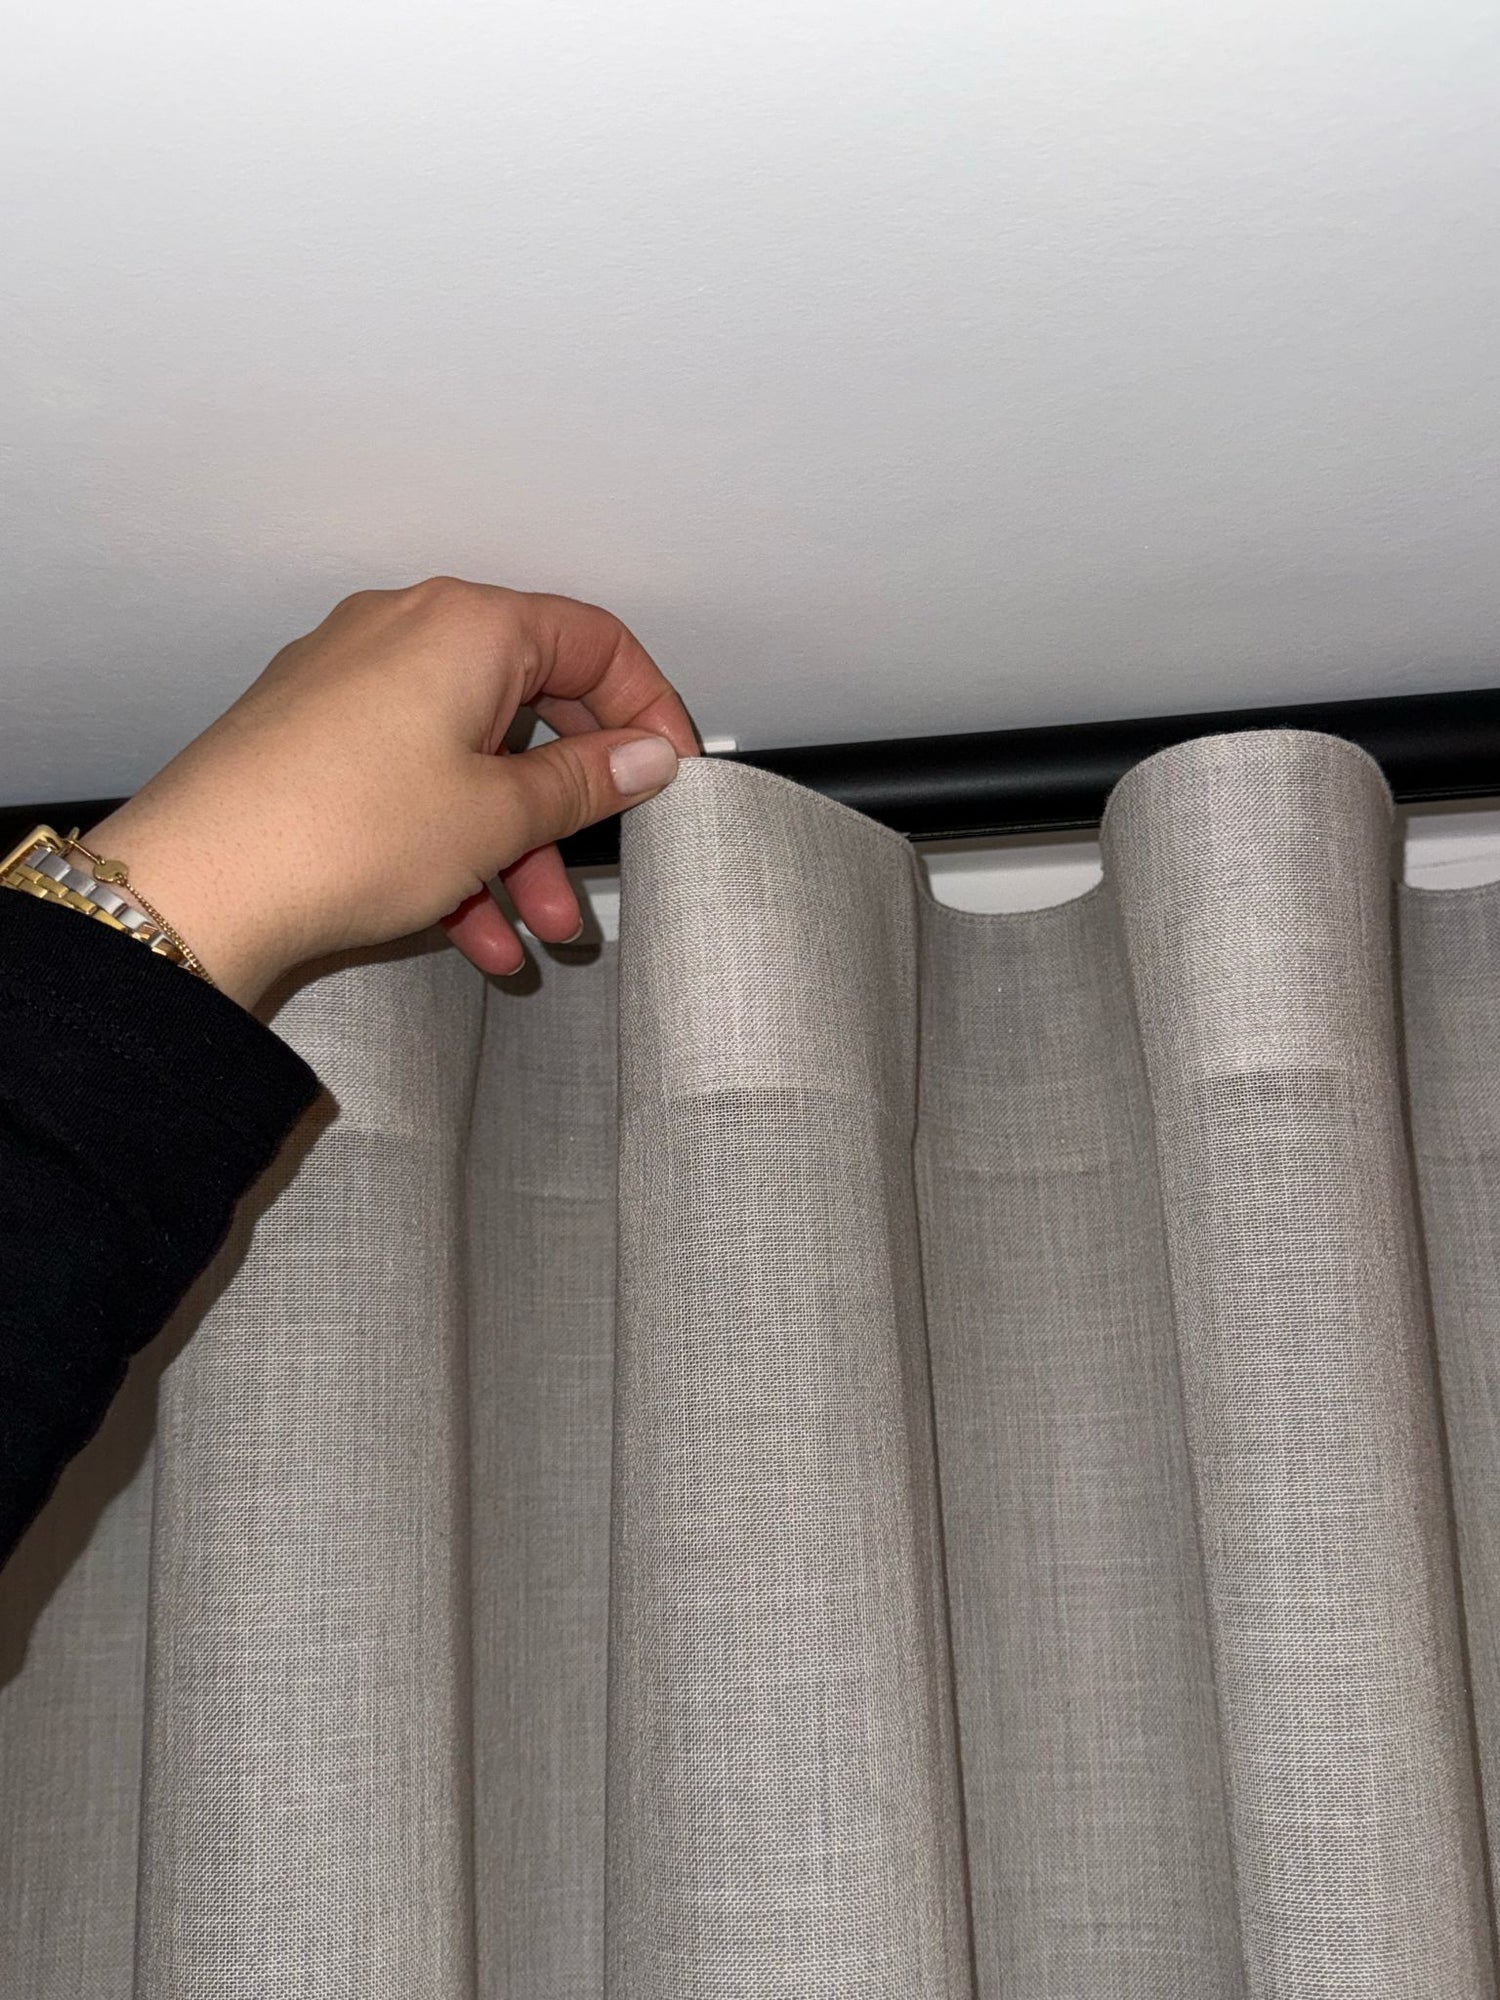
Step 4: Final Check & Finishing Touches
🔹 Open and close the curtain several times to check that it moves smoothly.
🔹 Smooth the pleats with your hands to ensure the fabric falls evenly.
Installation of Wave Curtains
Step 1: Attach Hooks to the Wave Gliders
🔹 Insert the supplied wave gliders into the curtain track.
🔹 Check that the gliders are evenly distributed, as this determines the wave effect of the curtain.
🔹 Make sure the gliders move smoothly in the track.
Step 2: Hang the Curtain
🔹 The hooks are already attached to the wave pleats of the curtain.
🔹 Attach the hooks one by one into the gliders in the track.
🔹 Do not skip any gliders, as this will affect the wave structure.
Step 3: Shape the Wave Structure
🔹 The typical wave pleat is created by gently pulling the fabric between the gliders forward.
🔹 Each section between two gliders should form a curved fold towards the front, while the hook areas should fall towards the back.
🔹 If needed, adjust the pleat distribution manually to create the perfect wave structure.
Step 4: Finishing Touches
🔹 Check the entire length of the curtain to ensure the waves fall evenly.
🔹 If necessary, realign individual pleats until the desired wave effect is achieved.
🔹 Test the curtain by opening and closing it multiple times to ensure smooth movement.